
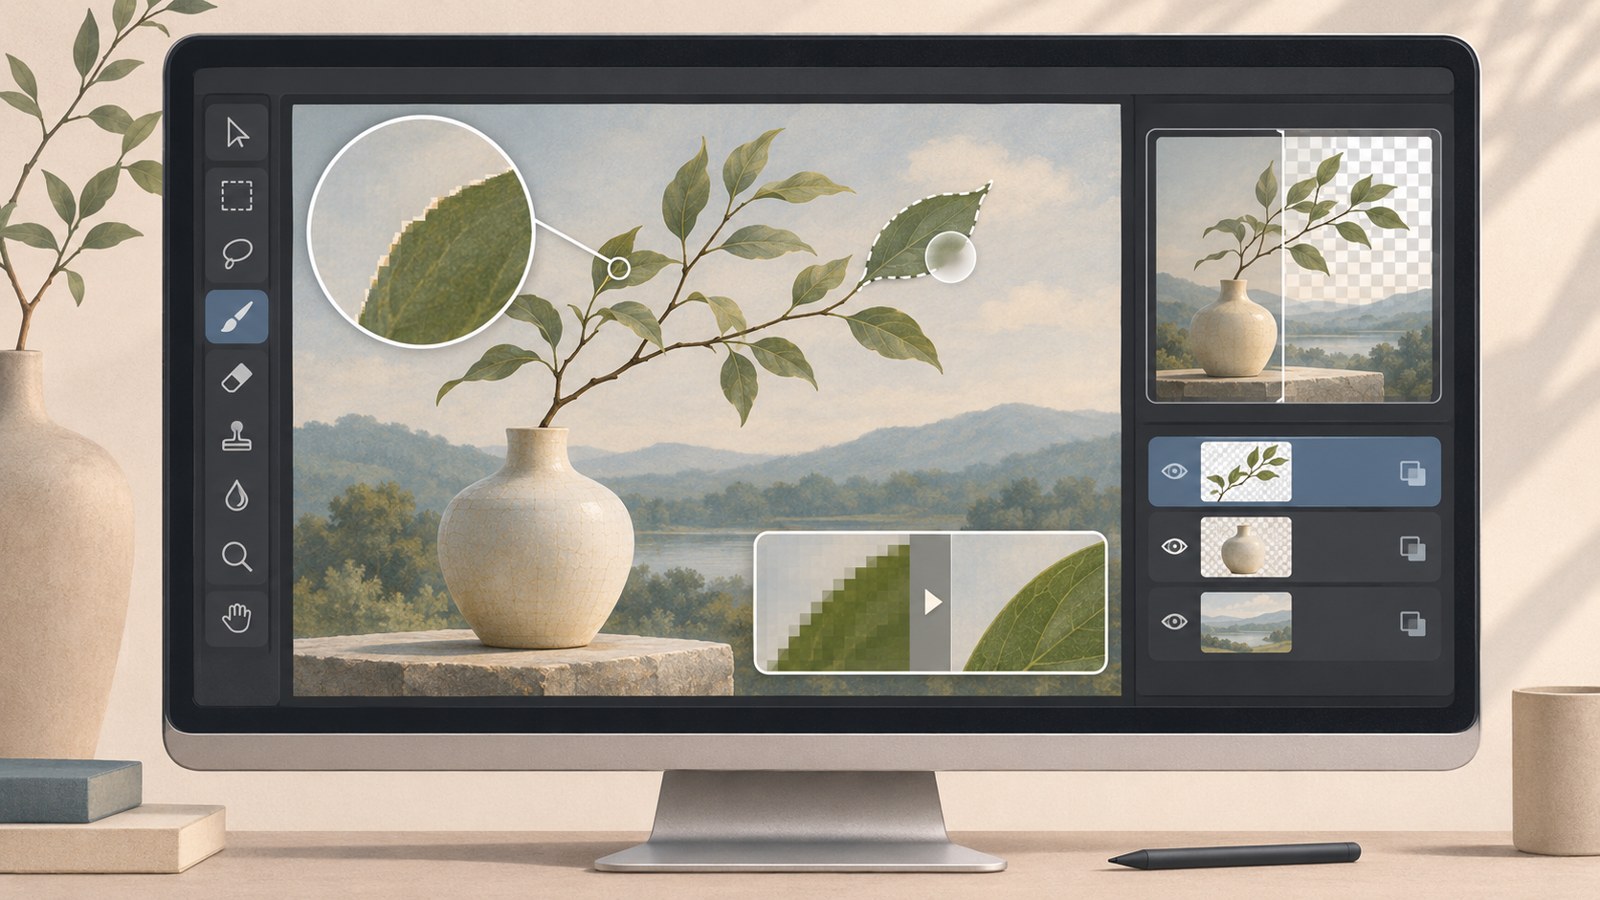
- Use Generative Fill to fix specific image errors.
- Upscale to the required output size, then inspect the result.
- Check delivery requirements for AI labels and editing history.
1. What to check before delivering a Photoshop AI image
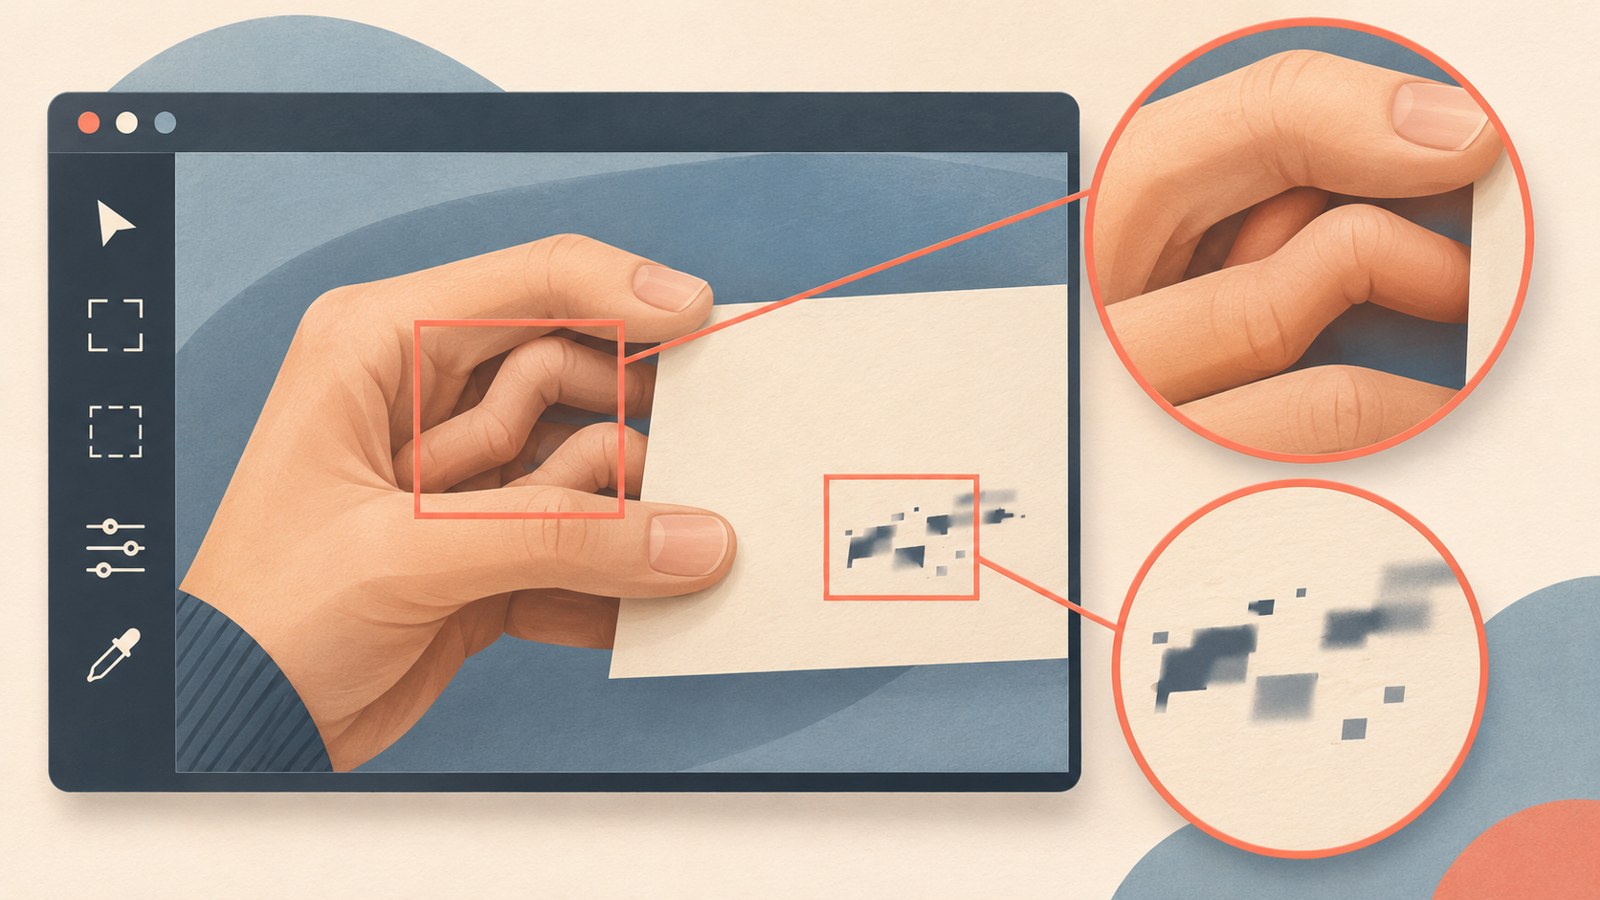
AI images can have visible flaws, such as an incorrect number of fingers, misshapen text, or blurred edges. Some are easy to miss when viewing the image small, so inspect it at a larger size before delivery.
For print or large-format output, check the resolution too. An image that looks fine on screen may lose sharpness when enlarged to the required print size.
If the image is meant to look like a real product or location, check whether it could give a misleading impression. Review the delivery requirements for AI labels or editing history as well. These requirements help determine what to inspect and document.
2. How to decide whether to keep or edit an image
You may only need to change part of an image. Check its intended use, delivery specifications, and brand requirements, then focus on areas that need attention.
A draft for internal review or a small screen may not need upscaling. For print or large-format output, check whether the resolution meets the specifications. Correct any distorted logos or text.
Check the contract and delivery terms for AI disclosure or editing history requirements. Compare them with the image service's terms of use and the permitted scope of use in your agreement.
| Check | May be usable as is | Needs editing or review |
|---|---|---|
| Intended use | Draft for a small screen | Print or large-format output |
| Delivery and presentation | Meets specifications and brand requirements | Disclosure requirements or detail errors |
3. Fix only the text or fingers that look wrong
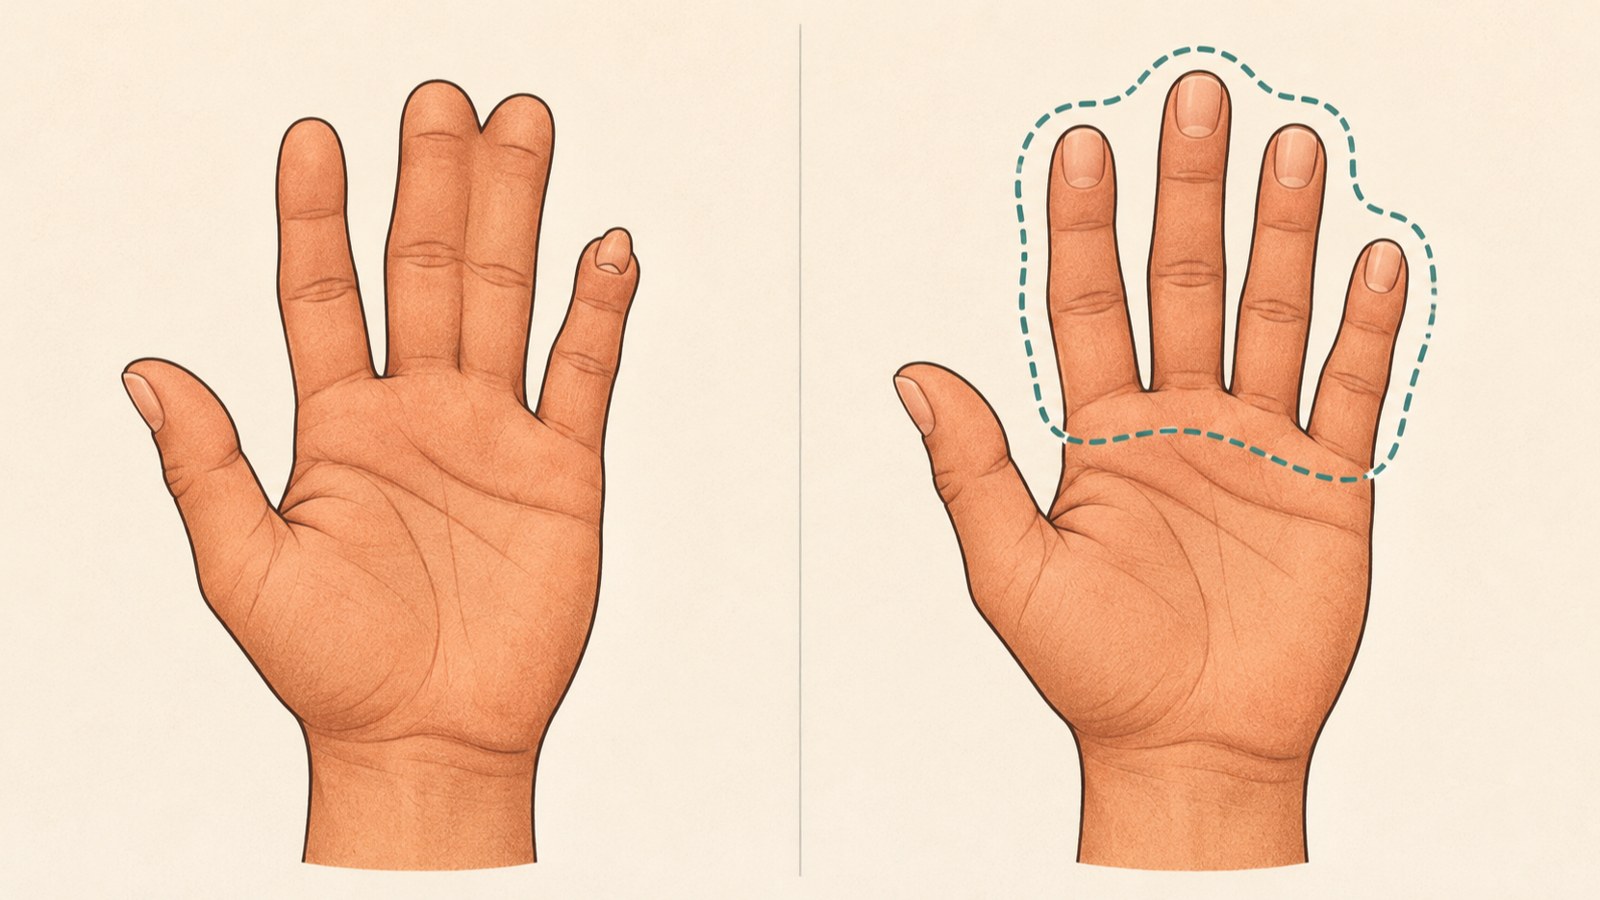
If the overall composition works and only a specific area looks off, consider Generative Fill. It regenerates the selected area while leaving the rest of the image in place.
The result appears on a separate generative layer. You can review the edited area in the Layers panel, which can help when organizing the editing history.
- Select the area with the error, such as the text or fingers.
- Use Generative Fill to edit the selection.
- Zoom in and inspect the edges and surrounding details.
4. How to upscale a blurry image
If the whole image is small or blurry, consider Generative Upscale. Choose a 2x or 4x output scale to enlarge it. The process may create new details.
After enlarging the image, zoom in and check fingers, text, and edges. If new errors appear, you can edit those areas with Generative Fill.
If only one part looks wrong, edit that area before upscaling the image. Consider the overall image size and local errors separately when choosing what to do.
- Check the size required for the final output.
- Choose 2x or 4x in Generative Upscale.
- Zoom in and check for errors in newly generated details.
5. When the subject looks separate from the background
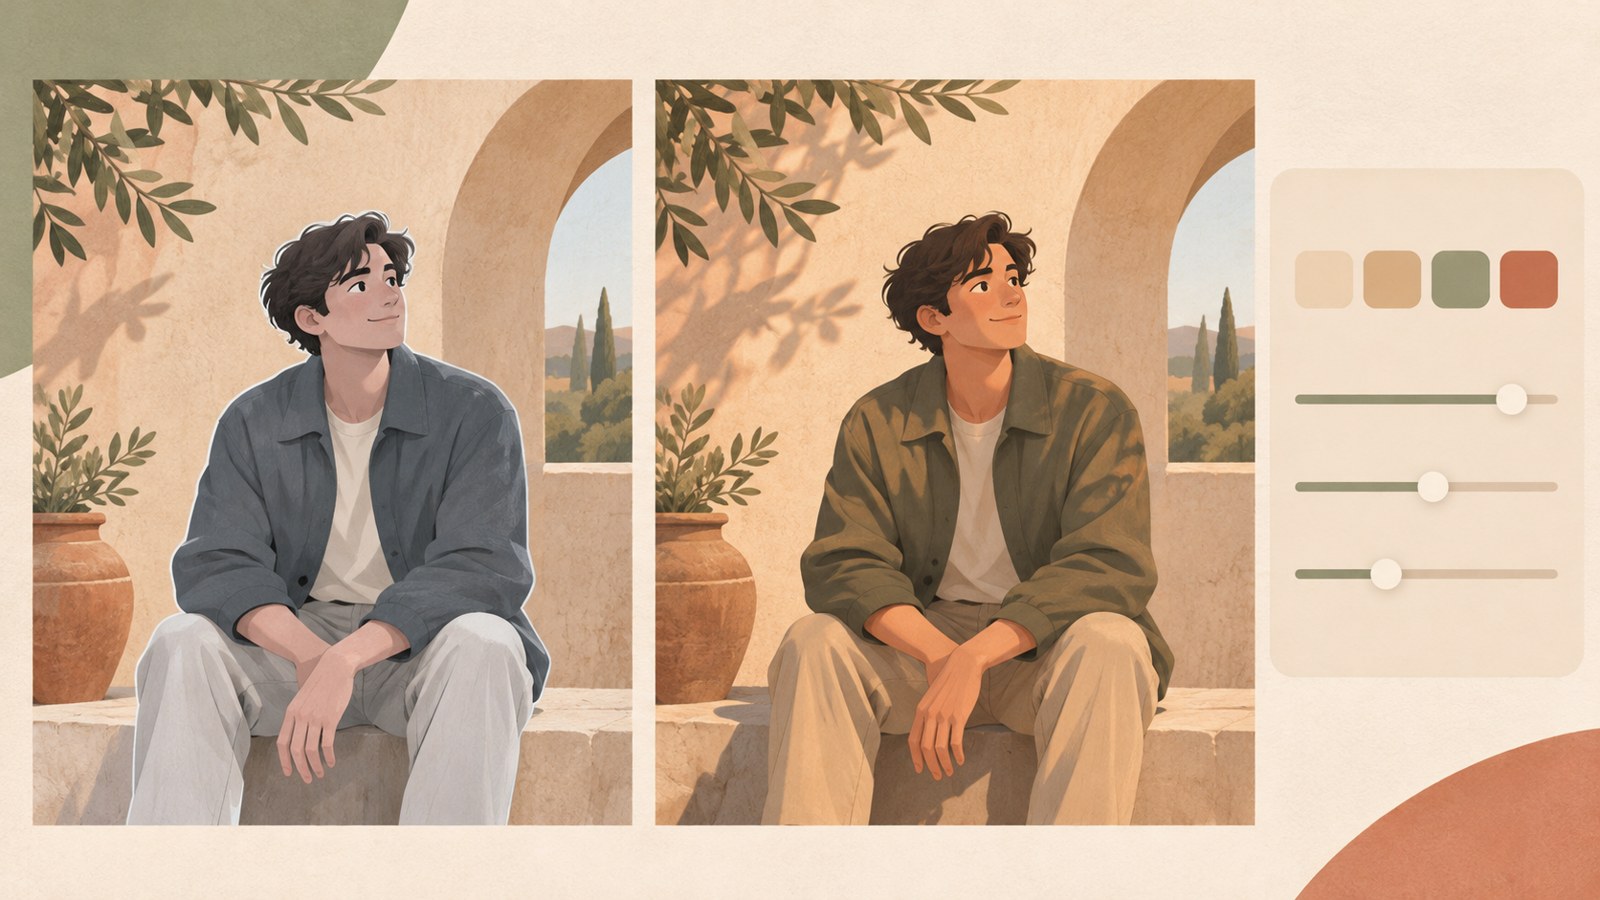
If a person or object placed on a photographed background looks composited, check whether the lighting, color, and tone differ. Harmonize uses the background's highlights, shadows, and hues to adjust the subject's lighting and color.
If the subject layer has a layer mask created with Remove Background, Harmonize may appear in the contextual task bar. After applying it, use the Properties panel to choose the result that best fits the background from the three AI-generated variations.
After choosing a variation, check the direction of the light and where the shadow meets the ground. Look for edge artifacts and any remaining errors in fingers or text.
6. Final checks before delivery
Before submitting an image edited with Photoshop AI, confirm its intended use and specifications. Web, social media, print, and large-format output may require different resolutions and color modes.
If the delivery terms require an AI label or editing history, record the features used and the areas changed, then compare that information with the requirements. Follow the client's guidelines when checking whether the image could be mistaken for a real product or person.
Consider Generative Upscale for overall sharpness, Generative Fill for specific errors, and Harmonize for lighting and color in a composite. Inspect the edited image at its final size and prepare any required editing history.
- Confirm the image's intended use and required specifications.
- Check the requirements for AI disclosure and editing history.
- Inspect the image's details and composite at its final size.
FAQ
What should I check if the Generative Fill button does not appear?
Check that you have selected an area. After applying the feature, look for a generative layer. Zoom in to inspect the result.
Can I use a small AI image in print?
First check the resolution and specifications required for the print job. After enlarging the image, zoom in to look for errors in newly generated details.
Do I need to label an AI-generated image when delivering it?
Check the delivery terms or contract for AI disclosure and editing history requirements. Compare them with the image service's terms of use and the permitted scope of use in your agreement.
댓글
댓글 쓰기